Friday, January 8, 2016

Arrowhead Rescue

Before I propped it up on a convenient gravel bar, this young Arrowhead plant, Sagittaria brevirostra, was riding the creek currents on its way out of Blue Jay Barrens.  I’ve never before collected anything but seed for my propagation studies, but I thought, since it was leaving the property on its own, I might has well transfer it to a pot and watch its development.

Survival of the specimen should be easy.  The plant already possessed a healthy root system and a tuber packed full of energy.

I find the Arrowheads typically growing in mud banks developed on the insides of creek curves.  These mud banks are transient, growing and shrinking at the whim of an unpredictable flood cycle.  Sometimes, entire colonies of the plants are lost to a particularly violent flood.  I imagine those plants travel downstream with the possibility of colonizing a new mud bank.

The plant was moved from the creek to a pot on May 20, 2015.  Two months later, the pot was filled to capacity with plants.  I emptied the pot and began to separate the plants in preparation for repotting.

Each new plant was equipped with a profusion of roots and rhizomes.  It was easy to see that a single plant finding its way to a suitable site could quickly produce a large population.

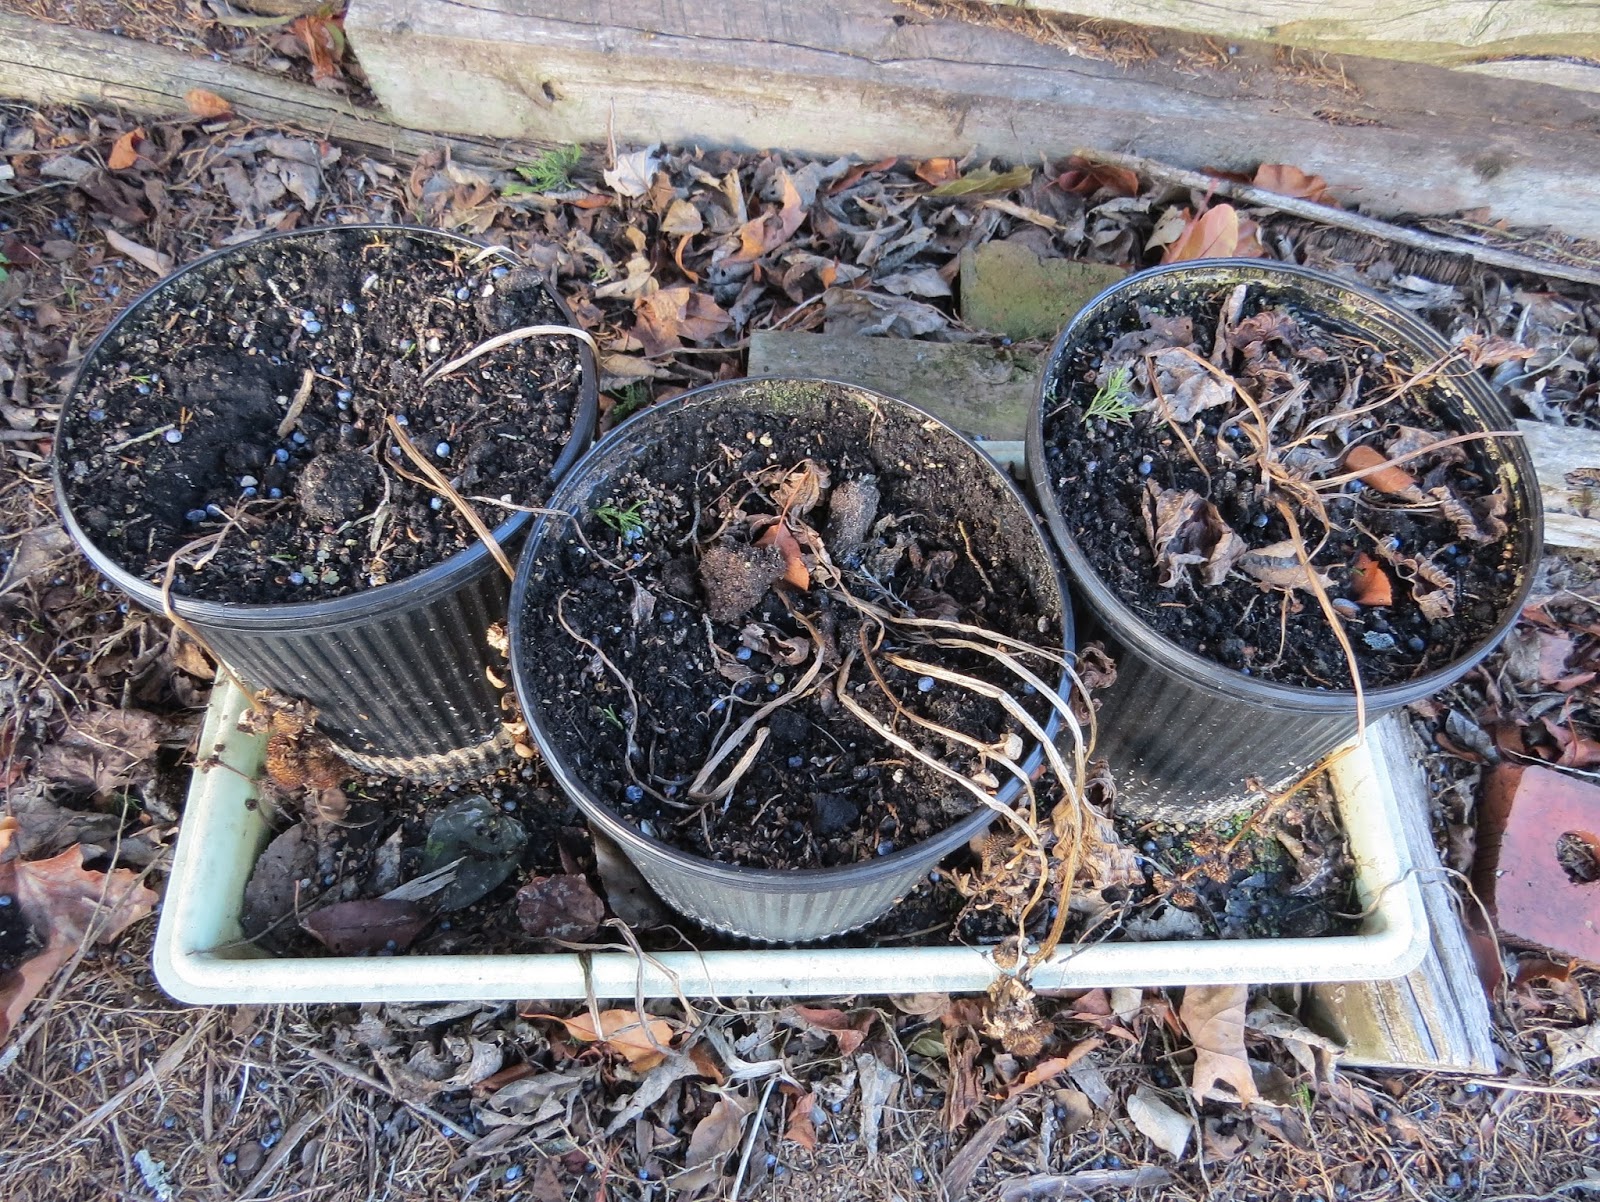
What once filled a single pot, seemed still crowded when spread into three.

The original rescued plant was the only one of the bunch that was not growing tall and straight.  When removed from the original pot, its roots were still near the surface of the soil as originally planted.  The rest of the plants arose from rhizomes that had penetrated to the bottom of the pot.

By early August, the plants were flowering.

This Arrowhead species produces individual male and female flowers.  A small fly visits this male flower.  Small bees and flies were the most frequent visitors to the arrowhead flowers.

The female flower.

The individual fruits are clustered to form a spiked ball.  Each fruit, achene, bears a single seed.

Shape of the mature achene is one characteristic used in the identification of species within the genus Sagittaria.  Achene shape can vary greatly among different plants of the same species and also within a single flower, so one should never be comfortable with an identification based on a single achene.

This species has little tolerance for the cold and was zapped by the first hard frost.  Plants in the creek grow where the creek water keeps the soil at a temperature above freezing.

I didn’t think the plants would survive their pots freezing solid, so they will spend the winter buried in a leaf filled pit with a loose covering of boards.  It would take a record cold year for freezing temperatures to reach the pots stored here.

Monday, January 4, 2016

Jefferson Salamanders Breeding

Five inches of rain fell at Blue Jay Barrens between December 22 and December 28.  The result was a pond full of water and the start of the 2016 salamander breeding season.  The water remained high and murky for a few days following the end of the rain, but by January 1 had regained its clarity and returned to its typical winter full level.

Egg clusters were evidence that salamanders had moved into the pond sometime during that December rain.  Even when I’m out at the right time, I rarely encounter salamanders entering the pond.  I believe most emerge from a series of subterranean passages associated with a seasonal spring that flows into the upper end of the pond.  During times of low pond water level, I have observed salamanders moving into and out of these passages.  When water level is high, the distance from the passage openings to the pond is less than a foot, so there’s not much opportunity to view a salamander heading for the pond.  Add to this the fact that runoff water travels both through these passages and over the passage openings, and it becomes nearly impossible to find salamanders while it is actually raining.

A few new egg clusters appear every day. 

Several egg clusters were attached to twigs that were inundated while the pond was in flood stage.  As soon as the water returned to its normal level, these eggs were left hanging in the air.  They have suffered from both drying and freezing, so they are lost.  Fortunately, the eggs suffering this fate were but a small percentage of the total in the pond.

The only species I am currently seeing in the pond is Jefferson Salamanders.  This is typical.  Jeffersons usually appear in early January, Streamside Salamanders enter the pond in early February and Spotted Salamanders show up in March.  The Jefferson Salamanders will remain in the pond for another month or two and will probably be joined by more of their species later in the month.  Near the end of the breeding season there will be Jefferson Salamander egg clusters in all stages of development from newly laid to ready to hatch.  Even though winter still has about two and a half months to go, the presence of salamander eggs makes me feel that spring has arrived.

Monday, December 28, 2015

2015 Krigia Project

On the day before Christmas, while the other family members were secreted away wrapping gifts, I took a trip to check on the progress of Potato Dandelion, Krigia dandelion, tubers planted out during August.  Many tubers were planted in this woodland site that mimics the original site of Krigia dandelion on the property.  As with the other woodland site, leaves completely covered the woodland floor.

Beneath the leaves were young Krigia sprouts.  Most of these plants displayed abnormally elongated growth resulting from their effort to find a way through the leaves to reach sunlight.  This growth pattern is typical of woodland grown plants.  Plants eventually find their way through the leaf cover, but rarely have an enough stored energy left to produce a flower.  The plants are able to survive and even generate new tubers, but spring blooms are unusual.

Knowing that Potato Dandelions have a tough time growing beneath the leaf cover or competing with other vegetation, I planted tubers in some barren areas bordering the woodland.  These sites generally have bare soil showing throughout the year.

The plants are doing quite well in this barren environment.  South facing slopes and a lack of ground cover allow these plants to receive an abundance of sunlight.  No leggy growth here.  Plants are forming tight whorls and the leaves are developing lobes, both signs that these plants will flower in the spring.  Several references refer to Krigia dandelion growing in prairies, rocky glades and woodland borders, so this may be the ideal location for this plant.  The unknown factor is the heat tolerance of the dormant tubers.  Temperature monitors set at a depth of two centimeters, have recorded summer soil temperatures as high as 125°F on these sites.  The majority of tubers that I have uncovered have been at or just below that level.  I guess I’ll have to wait until next fall to see how many plants make it through the summer.

Mild, wet weather has allowed the container grown Potato Dandelions to demonstrate some amazing growth.  Plants have nearly filled the pot.

Large plants have grown from the tubers planted in August.  I planted nine tubers in this pot.  You can almost identify the nine locations in the previous photo.

New growth includes a plethora of subterranean rhizomes that are responsible for the emergence of these smaller plants.  These young plants are unlikely to produce flowers in the coming year, but they will leave behind tubers that can give rise to flowering plants the following season.  This pot should yield hundreds of tubers next summer.

The plants are showing no signs of developing flower buds.  I am assuming that flower development is governed by photoperiod and that lengthening of daylight periods next April will trigger the creation of flower buds.  This species is roughly at its northern limits at Blue Jay Barrens.  The weather we have experienced so far this year is probably more typical of what the species encounters in its more southern haunts.  There’s still plenty of time for cold weather to appear though.   I’m sure I’ll have an opportunity to watch this plant endure some rapid temperature fluctuations over the next couple of months.

Wednesday, December 16, 2015

Newt Larva

After being dry for nearly six weeks, the pond was partially restored by a two inch rain during the last week of October.  I’ve been carefully watching for the arrival of the first breeding salamanders of the season.  Both Jefferson and Streamside Salamanders have been known to enter the pond in December.

Last night I spotted several small salamander larvae moving about in the water.

Using a fine meshed aquarium net, I scooped one out for closer examination.  The larva may look large in the photo, but it is actually only about an inch and a half total length.  The mesh of that net has 16 openings per lineal inch.  Beside the larva is a freshwater amphipod.

From the net, I dropped the larva into a glass jar for observation.  Identifying characteristics are poorly developed in a specimen this young, but there is no doubt that this is the larva of a Red-spotted Newt.  Red-spotted newts have a definite spring breeding season, but also seem to be opportunistic breeders throughout the year.  Breeding behavior is common in the water garden during summer and early fall, especially following a heavy rain.  This individual probably hatched from an egg deposited soon after the late October rain.  Eggs typically take three to five weeks to hatch, and warm water would have allowed hatching to occur closer to the three week mark.  I estimate this larva to be about a month old, so it still has four or five months to go before beginning a terrestrial life style.

As the larva develops, the head will become smaller in relation to the body and will develop more of a taper towards the snout.

The hind legs are just buds.  They will grow steadily over the next couple of months.

The beginnings of the distinctive dark eye stripe is just now forming between the eye and mouth.  By the time salamander larvae appear in the pond, the newt larvae will be formidable predators.

Wednesday, November 25, 2015

Treating Invasives

I took advantage of the mild weather during the first half of November to search out and eliminate some invasive shrubs.  Most of what I find now are young plants that have not matured enough to produce seed.  Birds will continue to bring in fresh seeds, and plants resulting from those seeds are what I am primarily dealing with now.  Birds that left seeds on this spot had a varied diet that resulted in a cluster of my four primary target plants.  Clockwise from upper center are Autumn Olive, Multiflora Rose, Bush Honeysuckle, and Japanese Barberry.

Japanese Barberry is a recent invader of Blue Jay Barrens and has not become very well established.  By the time the first Barberry plants began showing up, I had already begun dealing with invasive shrubs.  Only a few got up to fruiting size before they were discovered and removed.  This species is easy to control by stump spraying with glyphosate.  Even a maximum recommended dilution of the chemical is enough to kill the roots.

I’ve still got a couple of small patches that continue to produce a wealth of new Bush Honeysuckle plants each year.  Fortunately, the glyphosate stump treatment quite effectively kills this invader.  It’s discouraging to annually deal with so many new plants, but the sites are small and the number of plants continues to decrease.  Five years ago, the new Honeysuckle growth here was thick enough to block the view of the ground, so I am making progress.  I have to remind myself of that fact each time I work here.

Only one larger Honeysuckle specimen was found this year.  It was roughly six feet high, but was not old enough to produce fruit.  Last year, this shrub would have been only two or three feet tall and would have been easy to miss in its position on the lower slope of the creek bank.  I don’t mind finding an occasional large plant, as long as I catch it before it has a chance develop fruit.

Autumn Olive is the most difficult shrub to control at Blue Jay Barrens.  I use a stump treatment of undiluted glyphosate 41% concentrate solution.  This method is quite effective as long as the plant being treated is displaying healthy, bright green leaves.  Once the leaves begin to yellow and drop, it becomes more difficult to get a good kill.

Older, fruit bearing  Autumn Olive specimens can be killed by the same stump treatment, but there is a high likelihood of root sprouts appearing the next growing season.  It may take a couple of years to eliminate the sprouts.  Seedlings also tend to recur for several years following the death of the large shrub.  Birds feeding on the fruit, drop some of the seeds from the previous day’s feast.  Some of these seeds are ready to sprout immediately, while some may wait through a few seasons before germinating.  The good thing is that no matter where the new plants are coming from, their numbers tend to lessen with each passing year.

Autumn Olive can grow so rapidly that they sometimes seem to appear from nowhere.  This area of Indian Grass was mowed last November.  Small Autumn Olive plants, hidden in the thick grass, were cut off a few inches above ground level.  With a healthy root system already in place, the regrowth from those cut stems reached six or seven feet high in one season.

This is what the base of that plant looked like.  The dead stub in the center of the stem cluster is the single stem that was cut off last year.  It’s obvious that mowing is no way to control Autumn Olive.

To effectively treat young Autumn Olive, you must cut the stem flush with the ground.  The problem is that the stem you see may not be rising directly above the root.  Autumn Olive commonly produces a horizontal stem that later gives rise to the aerial branches.  This horizontal stem is often hidden by thatch or neighboring plants.  In the photo, the stem to the left was attached to the root and the vertical shoot emerged three inches away.  Cutting and spraying at the base of the vertical shoot would most likely not kill the plant.

I am also beginning an assault on the invasive Crown Vetch.  It was planted along the road about 40 years ago, but only recently has it begun to show up out in the fields. 

I was going to spray the Autumn Olive with Clopyralid this summer, but neighboring vegetation made it impossible to get the spray through to the vetch leaves.  Instead of spraying, I went around and identified the locations of all infestations, about ten in all.  I mowed them this fall and will do my spraying next spring when the vetch begins growing.  I guess I don’t have to worry about running out of invasives to deal with.

Monday, November 16, 2015

Fence Repair

Following a two day wind event, I took a walk along the new fence line to see if any branches had fallen on the fence.  No branches were found, but one large tree trunk had run afoul of the fence on its way to the ground.  To anyone unfamiliar with this view, the abundance of downed trees makes it hard to identify that one that is causing the problem.

There it is.  I have to admit it chose a nice place to fall.  Centered between two wood posts on a patch of level ground, it was probably the easiest place along the whole line to work on removing the log.  The most time consuming part of the job was the one mile round trip to the barn and back to get the tools I needed.

With a high tensile fence such as this, each wire strand stretches independently of the others.  The upper most strand takes the most punishment, while the lowest strand is hardly disturbed.  In this case, the fence wire is actually supporting this section of log off of the ground.  It was fortunate that the log, partially decomposed and heavily worked on by Pileated Woodpeckers, broke into sections on impact with the ground.  The log was held at an ideal position for cutting.

The fallen log caused increased tension on the fence wires that produced an upward pull on this steel post.  This was identified as an at risk post during installation of the fence and was equipped with a steel cable attached to a ground anchor.  The post was able to lift about half an inch before the cable came taught and stopped the rise.  This is how it was supposed to work.  I’m glad it followed the plan.

After cutting the tree trunk in two about a foot back from the fence wire, the remaining log could be pushed up and away from the fence.  Once the log was clear, the fence wires jumped back into place.

In order for the fence to take this kind of abuse without damage, it is necessary to install post clips and staples in a way that allows the wire free movement.  When the tree hit the fence, the added tension was spread over several hundred feet of wire.  Had the wire been firmly attached to these two posts, it surely would have broken as the tree made its way to the ground.

The fence is back to being good as new.  This is why high tensile makes such a good choice for use in wooded areas.